Good news, everyone: My bar mitzvah videos from the mid-1990s are now digitized for the ages.
While I have no intention of actually watching them — oy, the embarrassment — I recently received the original tapes from my parents and felt like they were worth preserving in a more enduring form than VHS. I was able to do it for cheap thanks to my USB capture card, which I originally bought to take screenshots of streaming devices for my TechHive column on cord cutting but which continues to have all kinds of other neat uses.
Below, I’ll walk through how to digitize your own VHS tapes or camcorder footage using the same methods, plus a few extra tricks that might make a USB capture card worth considering.
This column first appeared in Advisorator, Jared’s weekly tech advice newsletter. Sign up to get free tech tips every Tuesday.
The hardware
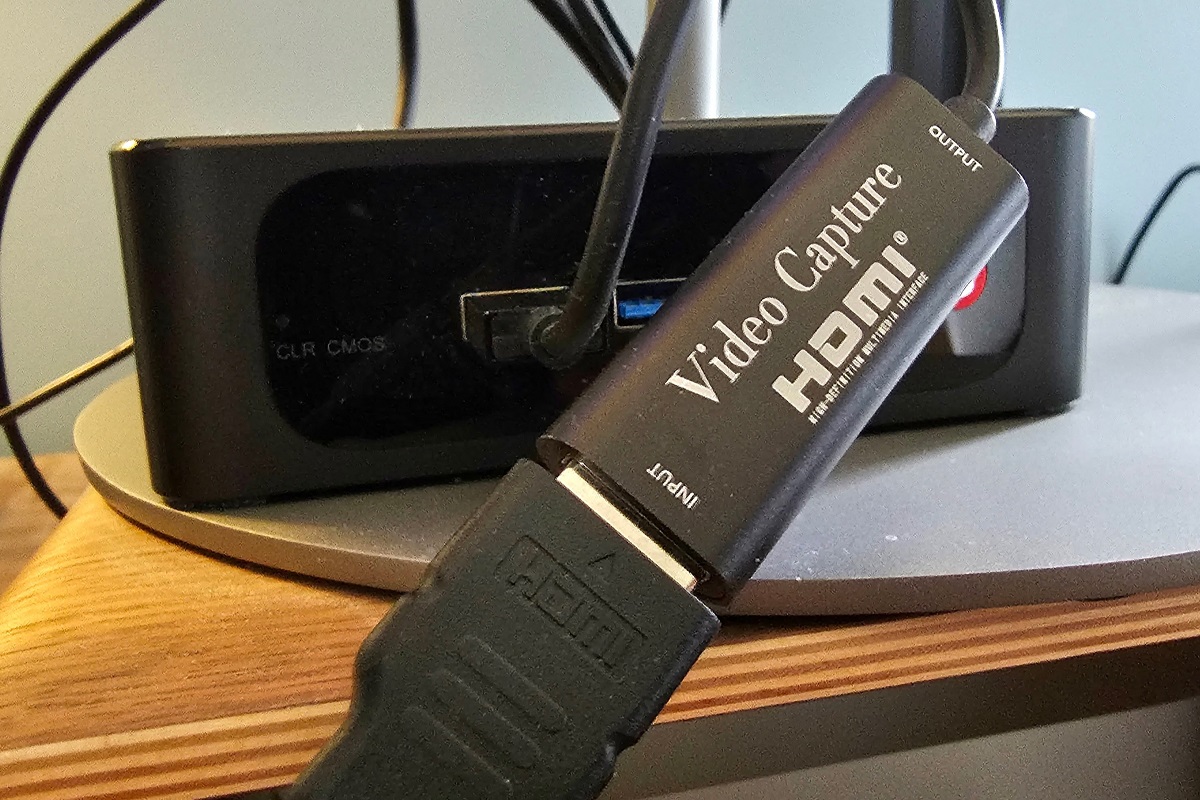
The USB capture card is a thumb-sized device with an HDMI input on one side and a USB plug on the other. Connect the capture card to your computer’s USB port, then hook up any device with HDMI output, and you can record that device’s video using a free program called OBS (more on that shortly).
Jared Newman / Foundry
Jared Newman / Foundry
            <div class="scrim" style="background-color: #fff" aria-hidden="true"></div>
    </div></figure><p class="imageCredit">Jared Newman / Foundry</p></div>
Amazon is filled with capture cards from no-name brands for under $20. While the particular one I purchased is no longer available, this one looks pretty similar, able to capture video at 1080p up to 30 frames per second, or 720p at 60 frames per second. It uses a USB-C connector, but also has a USB-A adapter. (Alternatively, this one works the other way around.)
You’ll also need a VHS player. If you don’t have one collecting dust in a closet — or don’t know anyone else who does — consider looking for one at a thrift store such as Goodwill, searching on Facebook Marketplace, or buying on eBay.
Of course, most VHS players don’t have HDMI output — including the one I pilfered from my father-in-law’s house for this project — so you also need a composite-to-HDMI adapter. I grabbed one on Amazon for $10.
The setup, in the end, looks like this:
VHS Player → Composite video out → Composite adapter → HDMI out → USB Capture Card → PC.
I’m using a Windows desktop, but this setup should work just as well with a Mac or Linux machine, or a Chromebook capable of running Linux apps.
The software
Jared Newman / Foundry
<div class="lightbox-image-container foundry-lightbox"><div class="extendedBlock-wrapper block-coreImage undefined"><figure class="wp-block-image size-large enlarged-image"><img decoding="async" data-wp-bind--src="selectors.core.image.enlargedImgSrc" data-wp-style--object-fit="selectors.core.image.lightboxObjectFit" src="" alt="Setting up a video capture device in OBS" class="wp-image-2288227" width="1200" height="844" loading="lazy" /></figure><p class="imageCredit">Jared Newman / Foundry</p></div> </div></figure><p class="imageCredit">Jared Newman / Foundry</p></div>The other half of the equation is a free program called Open Broadcaster Software Studio, or OBS. It’s often used to stream video game console footage on sites like Twitch and YouTube, but you can also use it to record from pretty much any HDMI video source.
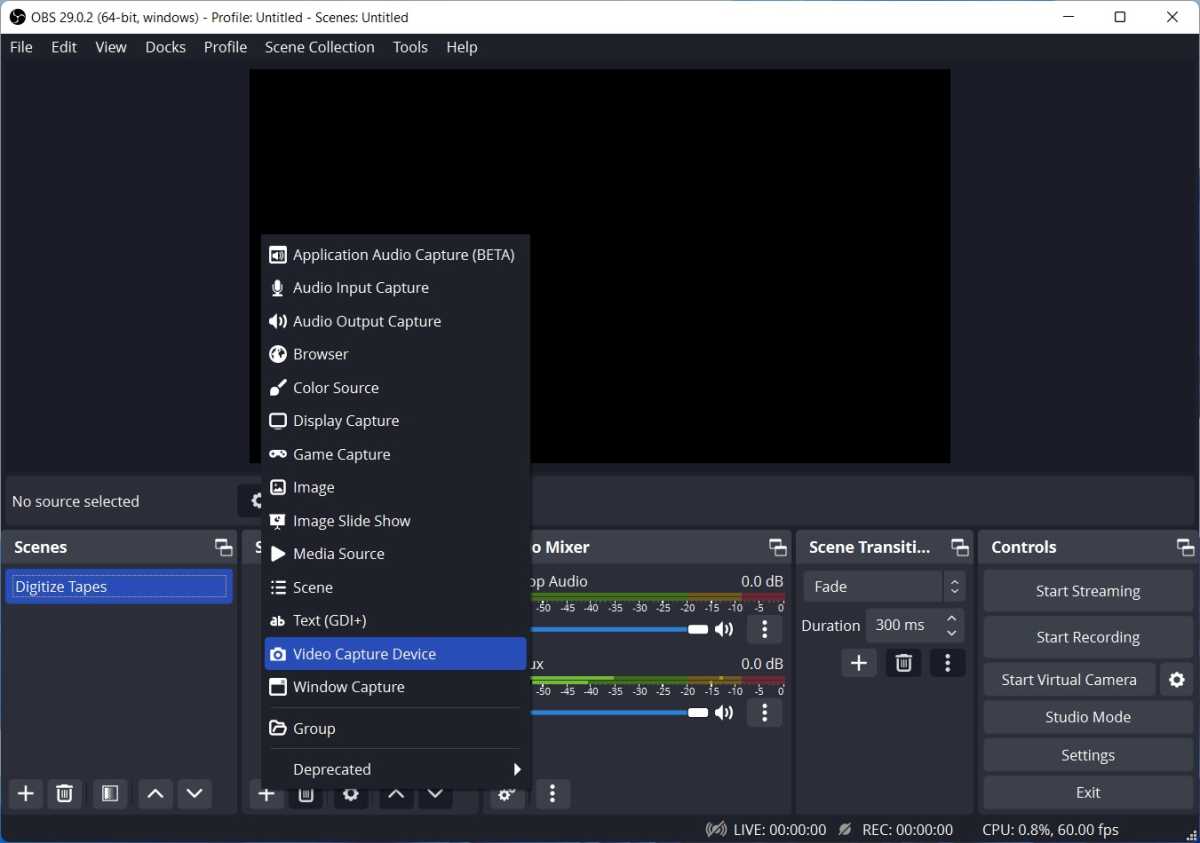
Once you’ve installed OBS and hooked up the USB capture card, you can record video with a handful of steps:
- Under “Sources,” hit +, then select “Video Capture Device.”
- Give the source a name, like “Capture Card,” and hit “OK.”
- Select “USB 3.0 capture” — that’s your capture card — under the Device heading.
Jared Newman / Foundry
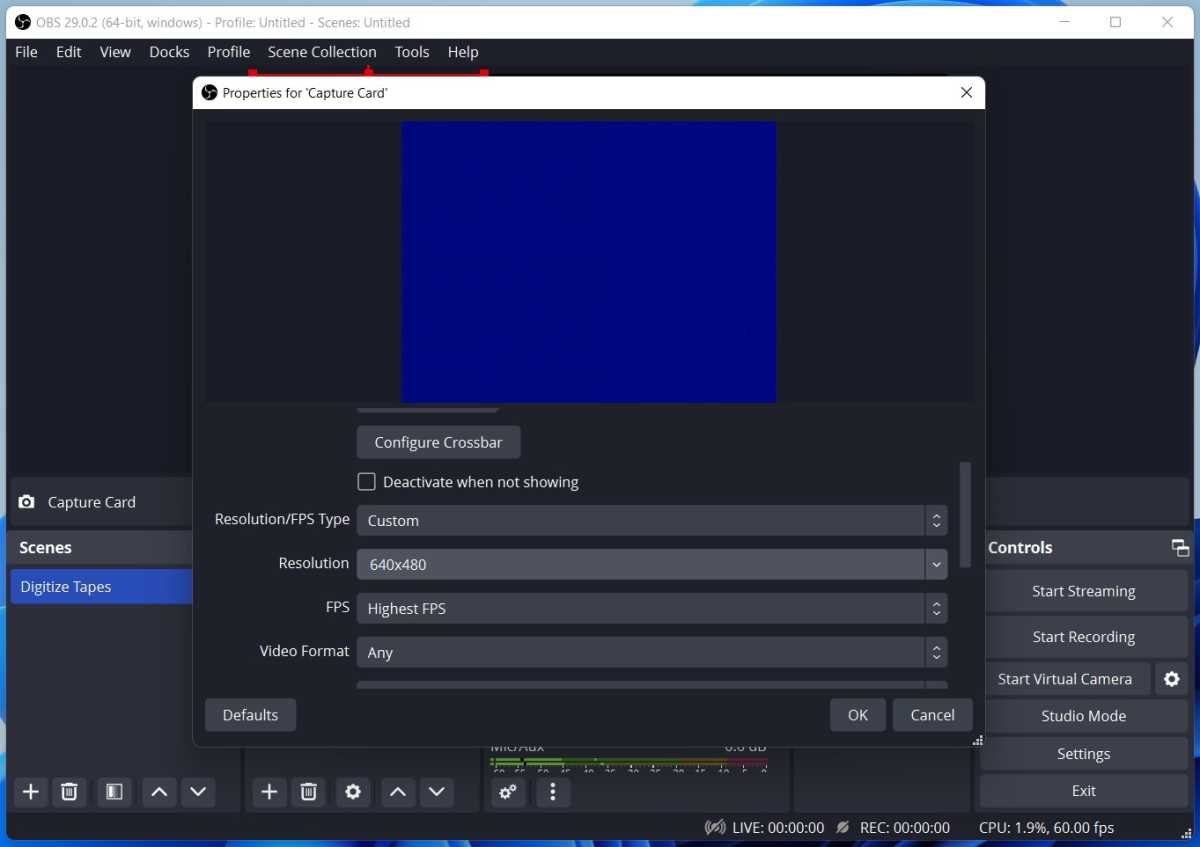
<div class="lightbox-image-container foundry-lightbox"><div class="extendedBlock-wrapper block-coreImage undefined"><figure class="wp-block-image size-large enlarged-image"><img decoding="async" data-wp-bind--src="selectors.core.image.enlargedImgSrc" data-wp-style--object-fit="selectors.core.image.lightboxObjectFit" src="" alt="Selecting the capture card resolution in OBS" class="wp-image-2288228" width="1200" height="848" loading="lazy" /></figure><p class="imageCredit">Jared Newman / Foundry</p></div> </div></figure><p class="imageCredit">Jared Newman / Foundry</p></div>- To preserve the VHS aspect ratio, change “Resolution/FPS Type” to “Custom” and set the Resolution to 640×480, then hit “OK.”
- Under “Audio Mixer,” make sure the “Desktop Audio” and “Mic/Aux” sliders are set to zero or muted.
- If you want to preview the tape player audio before recording, hit ⋮ under “Capture Card” in the Audio Mixer section, select “Advanced Audio Properties,” and set Audio Monitoring to “Monitoring and Output” for the Capture Card.
At this point, OBS should display your video when you hit play on the VHS player, but only in a small corner of the preview window. To fix this, drag the corner of the video so it fills the screen, then move the video into the center of the preview window.
Login to add comment
Other posts in this group
Microsoft has added an OCR function (Optical Character Recognition) t
If you’re reading this anywhere outside of China, you probably haven’