It’s a good idea to factory reset your Windows 11 computer every so often—ideally once a year, but definitely at least once every few years. It gives you a fresh start, fixes persistent bugs and issues, and clears out any bloatware you’ve accumulated over the years. Trust me, I recently decided to reset my Windows PC and wish I’d done it sooner!
Get Windows 11 pro for cheap
Windows 11 Pro
But re-installing all your favorite and necessary apps can be a right pain, and it even means opening Edge to download Chrome (shudder). Fortunately, there’s an app that simplifies all of that: Ninite.
Ninite is a huge time saver and it seriously streamlined my recent installation of Windows 11 on a new drive. I think every Windows user should use Ninite. Keep reading to learn exactly what it does, why it’s so great, and how to get started with it!
What is Ninite?
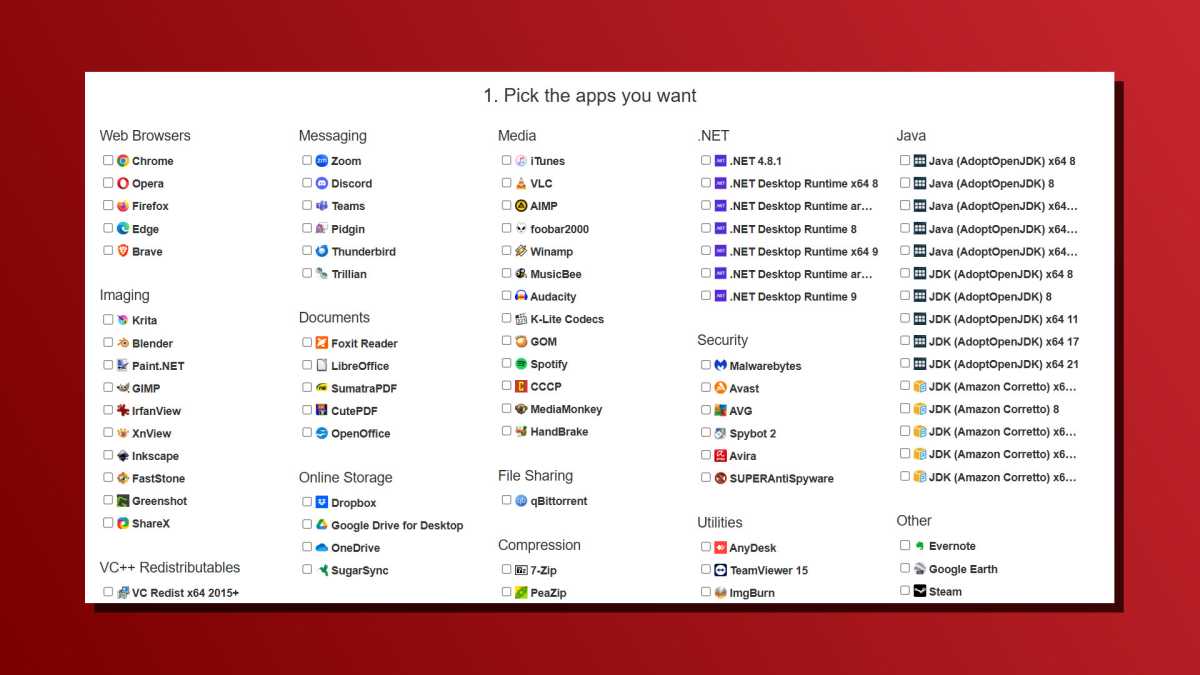
Ninite is a free tool that batch-installs all of your favorite PC apps in one go. On the Ninite site, you create your own custom installer by picking all of the apps you want included, then download it. Run that custom installer whenever you want and it’ll install the latest versions of all the apps you picked. How convenient is that?
You can pick and choose from major web browsers (e.g., Chrome, Firefox), image editors (e.g., GIMP, Blender, ShareX), messaging apps (e.g., Zoom, Discord), cloud storage (e.g., Dropbox, Google Drive), media players (e.g., VLC, Spotify), security apps (e.g., Malwarebytes, Avast), and other utilities (e.g., 7-Zip, Steam, Everything, etc.).
Joel Lee / Foundry
Build the installer once and store it somewhere, perhaps on a flash drive. Then, whenever you reset Windows, you just have it run it to get all these apps back on your system. The best part? It installs everything without prompting you with choices or options—it’s fully set-it-and-forget-it and everything gets installed to their default locations without any disruptive reboots, which drastically speeds up the process.
In short, Ninite feels like how a new Windows install should work. Fast, seamless, and automated. It’s one of my favorite Windows hidden gem apps, and it’s totally free!
Ninite isn’t just faster, but safer
For me, the major benefit of Ninite is how much faster it makes the factory reset/re-installation process, but that’s not the only benefit. It also makes the setup and installation of various apps safer.
While you can (and should) navigate to the official download sites for each and every app you install, that isn’t always easy or feasible. It’s not uncommon for the top Google results for many popular apps to be “sponsored” links by competitors or scammers looking to hijack your attention and steal your time, data, or even money.
Malwarebytes
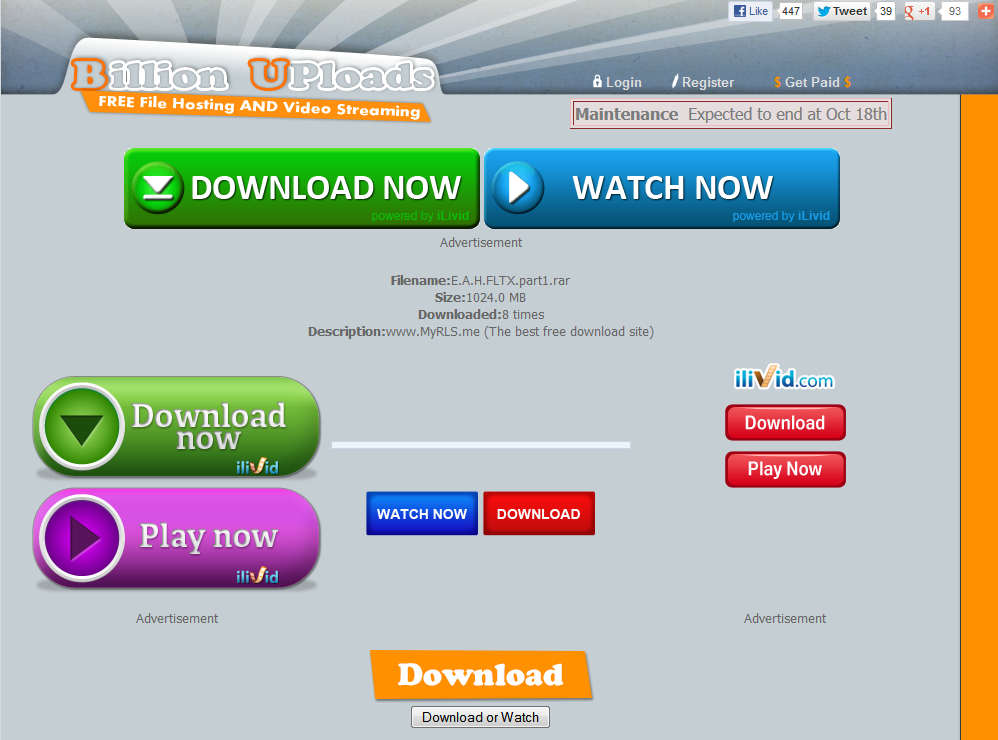
And Ninite is notably safer than using app download sites and repositories, which are notorious for phishing links and malware. In fact, app download sites are among the most dangerous places on the web. They cover their pages in fake download buttons—and even if you’re adept at spotting the correct links, you’re bound to make mistakes. I know I’ve fallen foul of the fake ones more than once…
The truth is, those fake downloads and phishing links are so plentiful because they work. People fall for them all the time. They’re engineered to blend in, to flood and overwhelm, to trick you. At best, you might spot a surprise pop-up ad… or you might end up with malware on your system and have to deal with a much bigger headache.
Ninite helps to mitigate most of these risks. It limits its app selection to the most trusted software (many of which are open-source), it always sources from their official downloads, and it installs everything at default with no extra bells or whistles. You know where it installs, what it comes with, and what it doesn’t come with, all without ads.
How to get started with Ninite
One of the best things about Ninite is how straightforward it is to use. There’s a paid version called Ninite Pro that includes some advanced functionality (like deploying apps on remote systems via your browser), but the free version is plenty good for most home users.
Jon Martindale / Foundry
Here’s how to get started with Ninite:
- Step 1: Go to the Ninite website and scroll down to the “Pick the apps you want” section.
- Step 2: Look through the list of available apps and tick the checkboxes next to the ones you want included in the installer.
- Step 3: Click the “Get Your Ninite” button at the bottom of the page and wait for your custom installer to download.
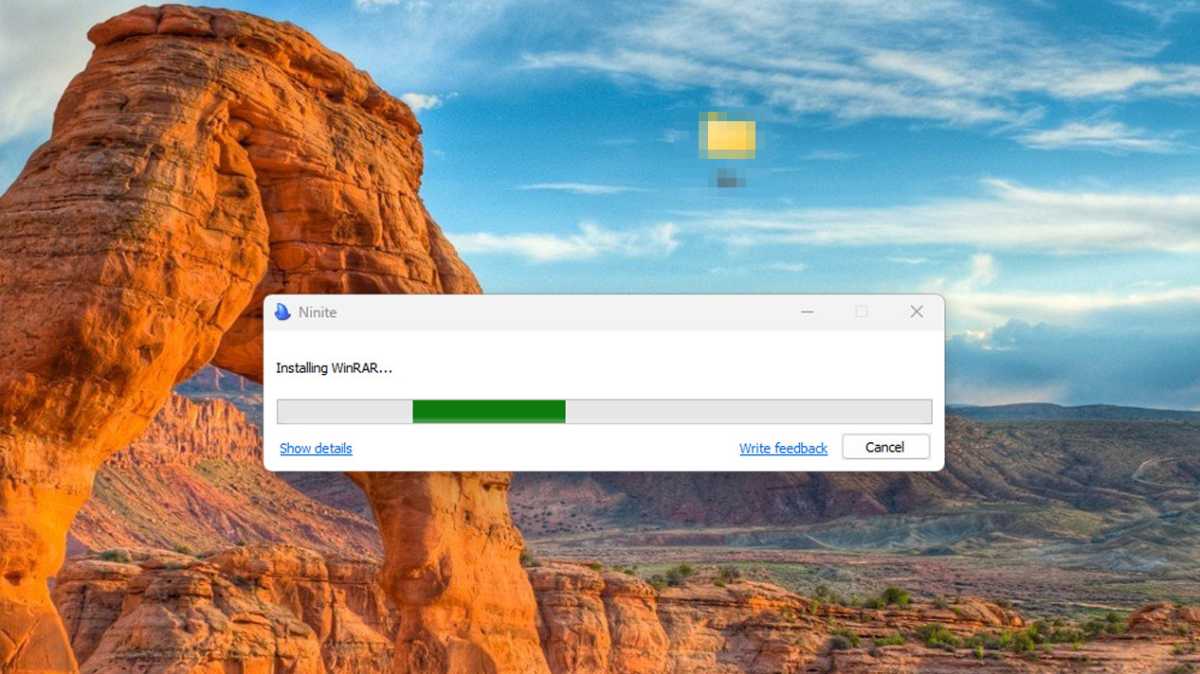
- Step 4: Find the Ninite Installer EXE file that you just downloaded and double-click to run it. Follow the installer prompts and it will begin downloading and installing all the software that you ticked to include. No need to choose an installation location or unmark extra bloatware options. Ninite handles it all for you, seamlessly.
After that, you’ll probably have a few other apps you still want to install. As great as it is, Ninite doesn’t offer every app under the sun… but for the most part, your newly factory reset PC will have all the basic apps it needs for security, editing, media, and web browsing, letting you get started much faster than if you’d done it all manually.
And remember, save that Ninite Installer EXE for later, whether for your next Windows reset or your next brand-new computer.
Further reading: Windows tips and tricks that save you serious time
Login to add comment
Other posts in this group
Each new generation of Surface devices typically includes a Surface P
Have you ever bought a streaming movie, only to find out the next day

We could all use some extra USB-C cables around the house, what with