If, like me, you spend an inordinate amount of time watching Netflix, you owe it to yourself to get things set up just how you like them. Here are three great places to start. All it takes is a minute or two.
Disable auto-playing previews
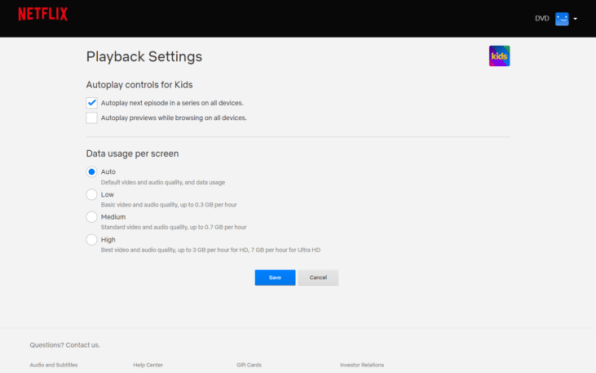
The bane of every Netflix user’s existence, the auto-playing preview feature, can (and should!) be turned off.
To do so, you’ll need to sign into your Netflix account from a web browser, click your profile image in the upper-right corner, and click the Account link.
From there, navigate down to the Profile & Parental Controls section. Select a profile and head to the “Playback settings” section. Atop that page, uncheck “Autoplay previews while browsing on all devices.”
You’ll need to tweak this setting for each profile, so if you live with a sociopath who actually enjoys the auto-playing previews, you can turn them off for your profile and leave them on for others.
Lock your profile with a PIN
What’s the point of having separate profiles when anyone can just access anyone else’s profile willy-nilly?
This setting is especially useful if you’ve got a profile set up for your kids and you don’t want them to be able to access your never-ending parade of grisly true-crime documentaries.
Following the same path as the previous tip, click your profile image, choose Account, select the profile you want to lock, and then choose the Profile Lock option.

Enter your password again and then check the box to require a PIN. Enter a four-digit PIN and, if this is the main profile to rule all other profiles, check the “Require PIN to add new profiles” checkbox as well.
From now on, the profile selection screen will feature a little lock icon under your profile and whoever tries to access your profile will need to know your PIN to get in.
Clean up the ‘Continue Watching’ row
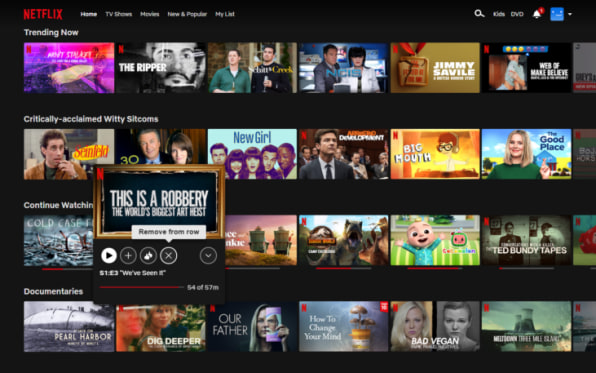
If you’ve subscribed to Netflix for any meaningful length of time, your Continue Watching row is probably a graveyard of shows and movies you’ve given up on halfway through.
It’s easy to remove content you’re no longer interested in, but how you do it varies depending on whether you’re watching via the browser, a mobile app, or a smart TV.
From the browser, find the show you want to remove, hover your mouse over it, and click the little X from the pop-up menu.
From the Netflix app on Android and iOS, find the show you want to remove, click the little three-dot icon in the lower-right corner, and select “Remove From Row.”
And finally, most smart TVs require an extra step. You’ll need to actually click into the show you want to remove, then arrow your way down in the navigation section on the left and choose “Remove from Continue Watching.”
Accedi per aggiungere un commento
Altri post in questo gruppo

Rarely has Silicon Valley experienced a more profound period of transformation than it has in the past handful of years. The big VC boom of 2020–2021. The great VC hangover starting in 2022. The g

A YouTube executive needed only 27 minutes to make the case that the company is taking over all aspects of how people create and consume video online.
That was the length of a recent tal

Every time I read about another advance in AI technology, I feel like another figment

Racist AI-generated videos are going viral on

Scientists are tracking a large gas planet experiencing quite a quandary as it orbits extremely close to a young star – a predicament never previously observed.
This exoplanet, as
Journey with me back to the good old days, if you will. There was a time that, when you’d buy a gadget, it’d come with a sometimes verbose but often helpful “instruction manual.”
Not a q

After more than a week of threats, Elon Musk formally launched the America