Ever searched for a file in Windows and come up empty? Or waited way too long for results? You’re not alone. Many users find Windows Search frustrating and it really boils down to its default settings.
By default, Windows only indexes certain locations like the desktop and the Documents, Pictures, and Music libraries under “My Documents.” If you organize your files differently, you might be left waiting or not finding anything at all.
Another quirk of Windows is that search results can vary depending on where you start the search. Whether you’re using the Start menu, File Explorer, or the taskbar, each one can produce different results.
In this guide, we’ll show you how to adjust Windows’ built-in search settings so you can quickly find what you’re actually looking for.
How to perfectly configure desktop search
It makes perfect sense that Windows doesn’t index the entire hard drive by default and also limits itself to certain file types. Otherwise, indexing would consume significantly more resources. The search would return all kinds of system files, too. You’d then have to painstakingly sift through those results to find the files you actually need.
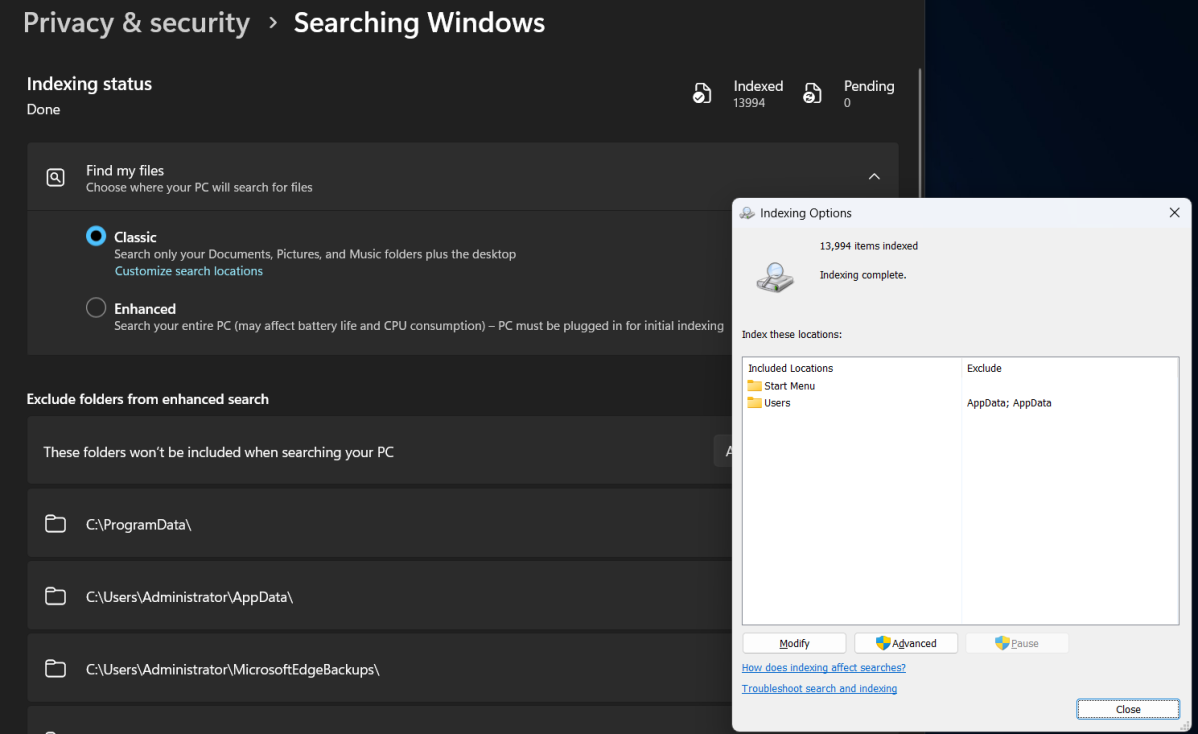
Unfortunately, that’s exactly what can happen if you carelessly activate the “Enhanced” option shown in the image above and overlook the “Search all” notice in the small print below.
That’s why, in the following steps, we’ll show you how to adjust the default search settings appropriately. The steps outlined apply to Windows 11, but they differ only slightly in Windows 10.
Here’s how it works: To customize which hard drive directories are indexed, open the Windows Settings app, click on “Privacy and security” on the left, and then click the blue “Customize search locations – Charge” link under “Classic” on the right.
This opens a window where you can use the drop-down arrows at the top to select which directories Windows should include in the desktop search.
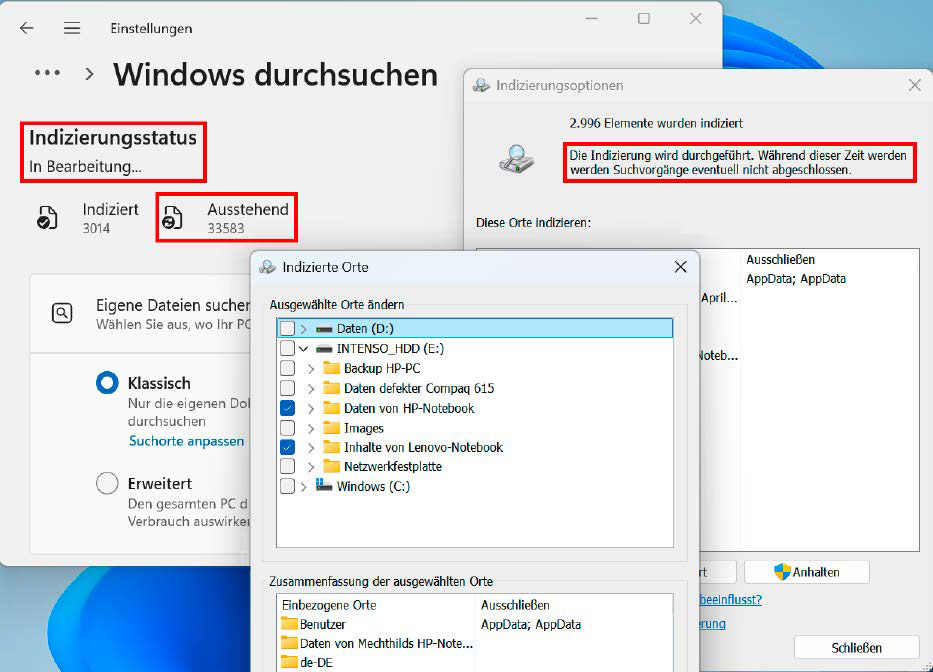
Confirm your selection with “OK.” Depending on the size and content of the additional folders, reindexing may take up to several hours.
During this time, you can continue using your PC as normal, but the search results may not work properly until the index is fully rebuilt.
Once indexing is complete, any files or folders you add or change later will be automatically (and almost immediately) added to the search index.
IDG
Network drives and external hard drives can also be included in Windows Search in much the same way. However, it’s important to note two things: first, the drives must remain powered on or connected until the message “Indexing has been completed” appears.
Second, the search functionality for external drives only works as long as the drive letter doesn’t change. If needed, use the USB Drive Info tool to prevent issues.
Additional settings are available via the “Advanced” button next to “Change.” Here, you can choose to index encrypted files, rebuilt the search index if problems arise, or change the location where the index is stored.
For example, you can move it to another partition if space on the Windows partition is running out. This is because the search index takes up another ten percent of the space required by the indexed files.
Using File Explorer for more reliable searches
Once you’ve configured desktop search, using it should (in theory) be simple and effective. Unfortunately, that’s not always the case.
For one thing, Microsoft offers two different entry points: the search field in the taskbar (or in the Start menu), and the one in File Explorer. These behave quite differently.
Although the taskbar or Start menu search is fast, it often doesn’t return the desired result. For example, even if the search term is part of the file name, Windows will only show it if the file’s storage location is included in the index.
The categories shown in the Start menu — Apps, Documents, Settings, Folders, and Photos — are also of little help. This is because, contrary to what Microsoft claims, they don’t filter by the type of file, but by its storage location.
So, if you are looking for a document saved outside the default locations, clicking on “Documents” won’t help. Ultimately, this search option often struggles to display results in a clear and structured way.
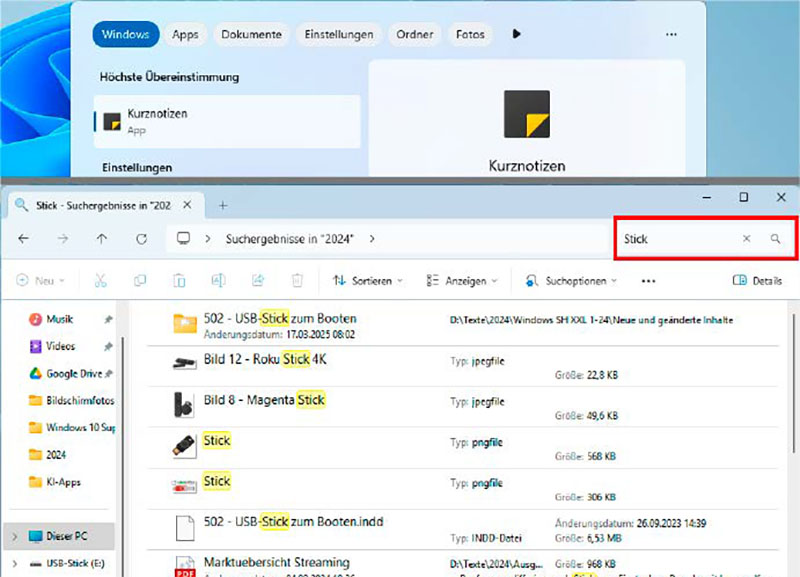
While the Windows Search via the Start menu often does not lead to the target (at the top), the classic search via the file explorer usually finds the desired files quickly and reliably.
IDG
The search in File Explorer offers more control, which in turn yields better results. As long as the open folder has been indexed for the desktop search, Windows lists everything quickly, correctly, and completely.
This also works when two or more keywords are entered. Even with hundreds of hits, you can easily narrow things down and find what you’re looking for. To do this, click either “Sort” or “Search options” in the menu bar at the top of File Explorer.
It may also help to disable the “File contents” option here.
Tip: Because search in the Explorer window always applies to the currently open folder and all its subfolders, make sure to select the correct level in the folder system on your hard drive before starting your search.
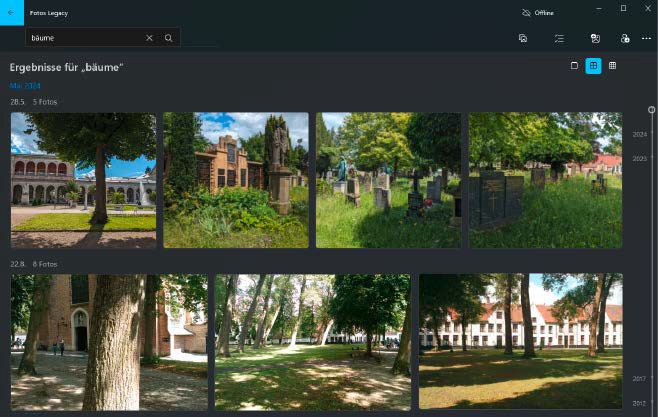
Finding photos by subject and people
Image analysis by subject and content is much more advanced than the desktop search for text-based content.
To use it, download Microsoft Photos Legacy from the Microsoft Store. This older Legacy app displays and organizes your images much like the newer Windows Photo Viewer, but it can do even more.
You can find a description of key features on Microsoft‘s website.
IDG
The Legacy app automatically analyses and tags your photos in the background. Without needing to manually assign tags, you can simply “search for people, places, and things” using the central search bar at the top. Overall, the automatic image analysis and search function works quite well, even if keywords tagging isn’t always accurate.
In addition, the Legacy app offers face recognition and OCR recognition for text in images. The text search also finds matching recordings and screenshots with corresponding content.
Best alternatives to Windows Search
When it comes to alternatives to Windows Search, Everything is one of the best. This lightweight tool is easy to use, offers a convenient interface for advanced searches, and supports a wide range of search operators.
Everything is also very fast: as soon as you type the first few letters into the input line, matching results appear.
After installation, the Everything icon appears in the bottom right-hand corner of the taskbar. You can launch and use the search quickly from there.
The “Advanced search” option (under “Search”) is especially useful. It lets you limit your search term to whole words, perform exact phrase search, use the either or logic, and exclude certain words, among other things.
Important: The yellow exclamation mark indicates that the tool does not search within file contents. So Everything isn’t a full replacement for Windows Desktop Search, but rather an extremely fast and powerful supplement for finding files of all types.
Tip: You can link the taskbar search field directly to Everything, replacing Windows Search for quicker file discovery.
Ultrasearch Free is also fast and, like Everything, uses Windows’ existing MFT (Master File Table) data.
This table contains all file information, including storage locations, file sizes, access rights, shares, write protection, archiving, file type, timestamps, and more.
Ultrasearch can also search the text content of documents on request (via the “Search for file content” input line on the right), but it doesn’t use an index for this. To prevent the search from tasking too long, it’s best to limit the directories in the field below “Suggested paths” as appropriately as possible.
We also recommend two other programs for file searches: DocFetcher and Search My Files.
Alldup specializes in finding duplicate files, helping you free up additional storage space.
Finally, Powertoys Run (part of the Microsoft’s PowerToys collection) allows you to search for applications, folders, and files.
Challenges with Recall Search
Recall, as a brief reminder, was supposed to be the central feature of Windows 11 24H2 on the new Copilot+ laptops launched last summer.
The tool is designed to make everything you’ve edited, searched for, or opened on your PC quickly retrievable. To do this, Recall continuously takes screenshots, analyzes and indexes them.
However, because Microsoft initially paid far too little attention to data protection, Recall was withdrawn before it was launched.
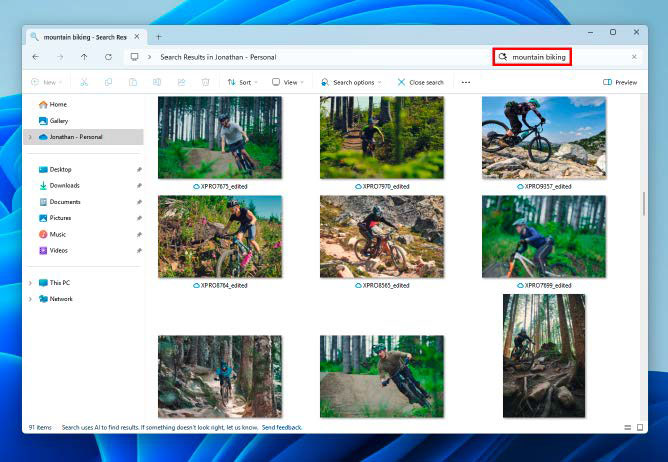
Microsoft is working on a new AI-supported search on Copilot+ PCs, which is designed to recognise photos based on their subjects, among other things. It still only exists as a pre-release version in the Windows Insider builds.
IDG
In the meantime, Microsoft has improved data privacy and integrated the “new” Recall into Windows 11 via an update.
In practical tests, the new version leaves a good but somewhat ambivalent impression: the search works impressively well, yet also reveals significant gaps.
This is b
Autentifică-te pentru a adăuga comentarii
Alte posturi din acest grup

Arlo announced a refresh of its entire home security camera lineup to


Wyze was an early player in the budget home security camera game, but


As the back-to-school season approaches in 2025, teachers aren’t just

If you’re in the market for a superb laptop with excellent battery li

Turning your house into a smart home might isn’t the dauting task you