Even supposedly straightforward tools such as Windows Explorer offer options that are not always recognizable at first glance. The search function, for example, not only finds files and folders. With additional search options, the result can be refined and used for numerous purposes.
However, the Windows search is not always fast enough and often does not deliver the desired results. This can be optimized, but alternative search tools offer better performance, depending on the purpose.
There is also room for optimization in the Windows update. This allows the system and some Microsoft applications to be updated automatically.
For some time now, Microsoft has been offering a tool for the command line that can be used to install and update popular tools and applications. Here we present a program that enables convenient control via a graphical user interface.
Further reading: 10 Windows 11 tips and tricks we use to customize our PCs
1. Use the Windows Explorer search function
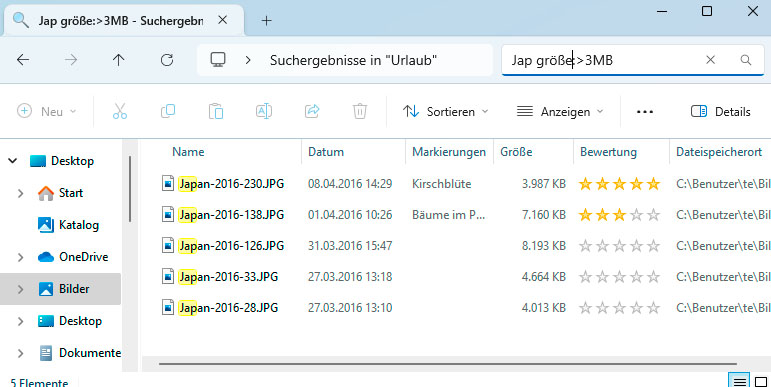
Optimize your search: Search options can be used to restrict the results to files with a specific size or user-defined property, for example.
IDG
Searching for file or folder names and file contents tends to be slow, especially on well-filled hard drives. It is faster if you at least know the folder under which a desired file is probably located. The quickest way for Windows to find files is within folders in your own user profile. Windows automatically creates a search index for these folders, which catalogs the names and sometimes also the file contents.
If required, additional folders can be added to the search index — for example, from a second hard drive (point 3). To perform a search, start Windows Explorer, navigate to the folder you want to search and enter the search term in the field at the top right. With Windows 11, the search starts immediately; Windows 10 users confirm with the Enter key or the arrow button.
When a search is active, Windows 10 displays the “Search tools” tab; in Windows 11, the “Search options” button appears. You can use both to select options to narrow down the search results. For example, you can set a modification date such as “Yesterday” or “This week” or select a file type such as “Document” or “Folder” behind “Type.” Windows completes the search query in the input field — for example, with “art:document” to search for documents. Some options have been removed in Windows 11. Windows 10 also offers a search in metadata such as “Authors” or “Tags” under “Other properties” (point 2).
Microsoft has only partially documented the advanced search syntax. In addition, the keywords vary depending on the system language and are sometimes mixed English and German. An older, but largely still valid list can be found on this website. Some examples of search queries:
- changedate:>1.11.2023: finds all files that were changed after the date specified after “>”.
- changedate:>1.11.202330.11.2023: All files that were changed between the two dates.
- size:>1GB: Files that are larger than 1GB.
- author:Sepp: Finds files where the author’s name is Sepp.
- marker:important: Files with “important” entered as the marker in their properties.
- rating:5 stars: Files that are rated with 5 stars in their properties.
- latitude:(28 9): Searches in image files for the GPS data 28 degrees, 9 minutes.
The search result can be used in many ways. For example, you can find particularly large files that are not always needed and save them to an external hard drive. A query with “marker:” or “author:” helps when searching for specific files, but also when compiling files based on criteria. You can read how the properties of files can be customised in point 2. The search result can be used like other views in the Windows Explorer window. Files can be selected, copied or moved.
2. Edit the properties of files
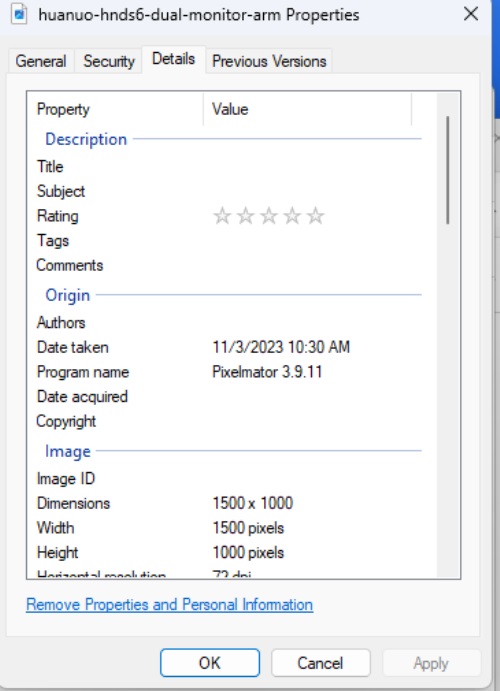
Foundry
Each file has several standard attributes, such as creation date and modification date. However, some file types also contain meta information, such as JPG files. What is available depends on the camera or image editing program. Right-click on an image file in Windows Explorer, select “Properties” and go to “Details.”
You will usually find information on the camera manufacturer, the exposure time and GPS data. You can edit or add data by clicking on the field in the “Value” column after the description. Possible options include Title, Subject, Rating and Marking. If you select several images and then go to “Properties” in the context menu, you can adjust the data for all selected files at once.
In Windows 10, you can go to View > Details pane. Windows Explorer then displays the most important information in a separate column. The values can also be edited and saved here.
Windows 11 users go to View > Detail area. Nothing can be changed here. Instead, there is the “Properties” button, which you can use to navigate to the “Details” tab for customizations.
For other file types, the metadata that can be customized depends in part on the installed programs. For Doc files it is possible by default, for Docx files an installed Microsoft Office is required. For Libre Office files, the office package must also be installed. However, Windows Explorer only displays the metadata; changes can be made in Libre Office via File > Properties.
The metadata can be used for searching (point 1), but can also be displayed in Windows Explorer. Activate View > Details (Windows 11: Show > Details), right-click on a column header and go to “More.” Tick the properties you want to see, for example “Marks” and “Rating.” The list can then be sorted by these properties by clicking on the column header. This also works in the search result if you switch to the “Details” view.
3. Customize settings for index creation
The Windows search indexes files in the user profile and in the “Public” folder by default. You can add or remove folders from the search index.
Open the “Settings” (Win+I), search for indexing and click on “Windows Search Settings.” The default option is “Classic” and includes the user’s own files. “Advanced” extends the search to other folders. Below this is a list of folders that are not searched. You can remove or add folders from this list.
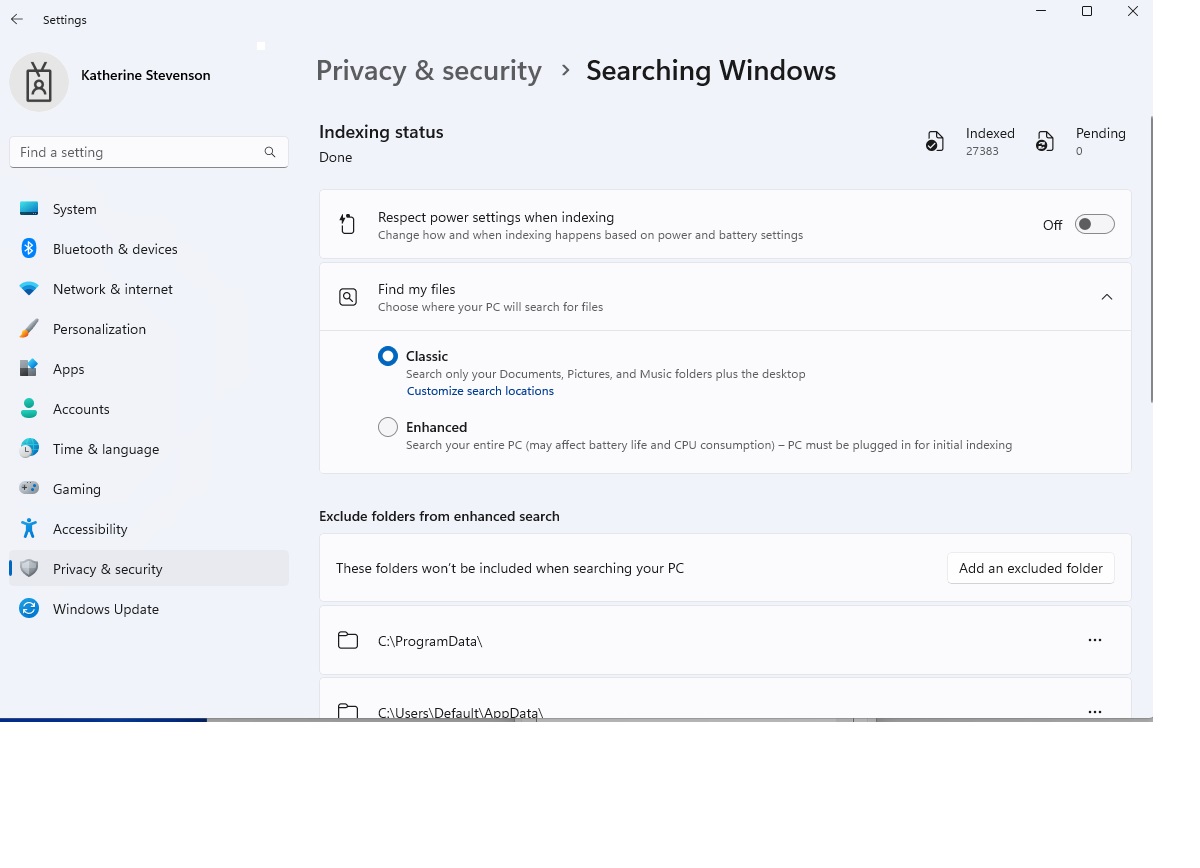
Where to search? Windows offers the search modes “Classic” (own folders) and “Advanced” (entire PC) in the “Settings.” Some folders are excluded by default.
Foundry
Detailed settings can be made by clicking on “Advanced indexing options” (Windows 10: “Advanced search index settings”). Click on “Modify,” expand the tree view and place a tick in front of the desired folder.
Click on the “Advanced” button. If required, tick the box next to “Index encrypted files.” Extensions and the associated filter descriptions are listed on the “File types” tab. For each entry, you can choose between “Index properties only” and “Index properties and file contents”.
4. Search for files on the hard drive faster
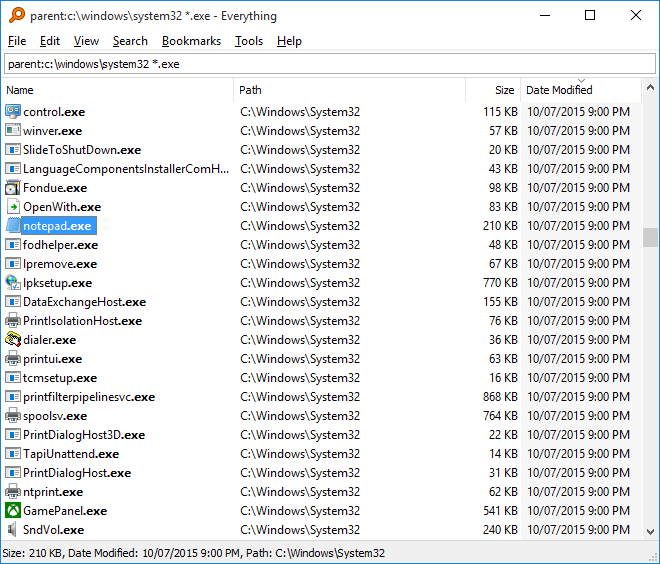
The fastest search: Everything finds files and folders on the entire hard drive in fractions of a second. New files are taken into account immediately.
Foundry
The update of the search index is usually delayed under Windows, which is why the search for recently created files often shows no results. In contrast, the Everything search tool offers a real-time search across all hard drives and is exceptionally fast.
The secret: Everything does not create a full-text index, but uses the Master File Table (MFT) of the NTFS file system. This contains file and folder names as well as the names of the element above them in the directory tree. Everything uses this information to create a small database with the complete path names, which takes a short time the first time it’s initiated. The tool then monitors the file system and immediately writes changes to its database. However, Everything can only search for file and folder names and not for file contents.
Everything offers several options in the “Search” menu. The search can be limited to file types such as “Documents” or “Images.” After clicking on Search > Manage filters, you can edit the filters and add file name extensions, for example. You can also create your own search filters.
Via Extras > Settings under Database > NTFS drives you can exclude individual drives from being included in the database.
If “Automatically remove offline drives from database” is not ticked, Everything saves file and folder names from external hard drives permanently. You can find files on them even if the drive is not currently connected.
Transfer files quickly to other devices
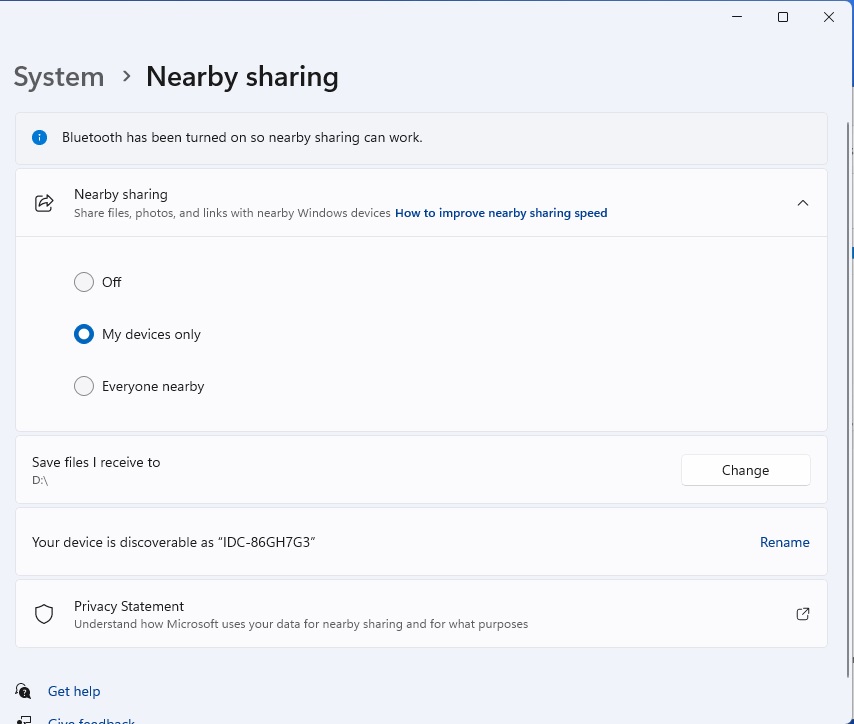
File transfer nearby: As soon as the share function is activated in Windows, a file can be transferred to another device. The target computer can be seen under “Nearby sharing”.
Foundry
Network shares can be used for file transfer, but they are complicated to set up.
It is easier with environment sharing. The prerequisite: Bluetooth and WLAN or Ethernet must be activated on all devices. In the “Settings,” go to System > Nearby sharing (Windows 10: System > Sharing). Select the option “Only my devices” if you are logged in everywhere with the same Microsoft account. Otherwise, select “Everyone nearby.” Below this, you can configure a folder in which received files are to be saved.
To send a file, select “Share” in the context menu and click on the name of the other PC. The receipt must be confirmed on this PC.
The Nearby Sharing app in Windows can also be used to transfer files from an Android device. However, the app can currently only send files and not receive them.
5. Reliable and fast search for file content
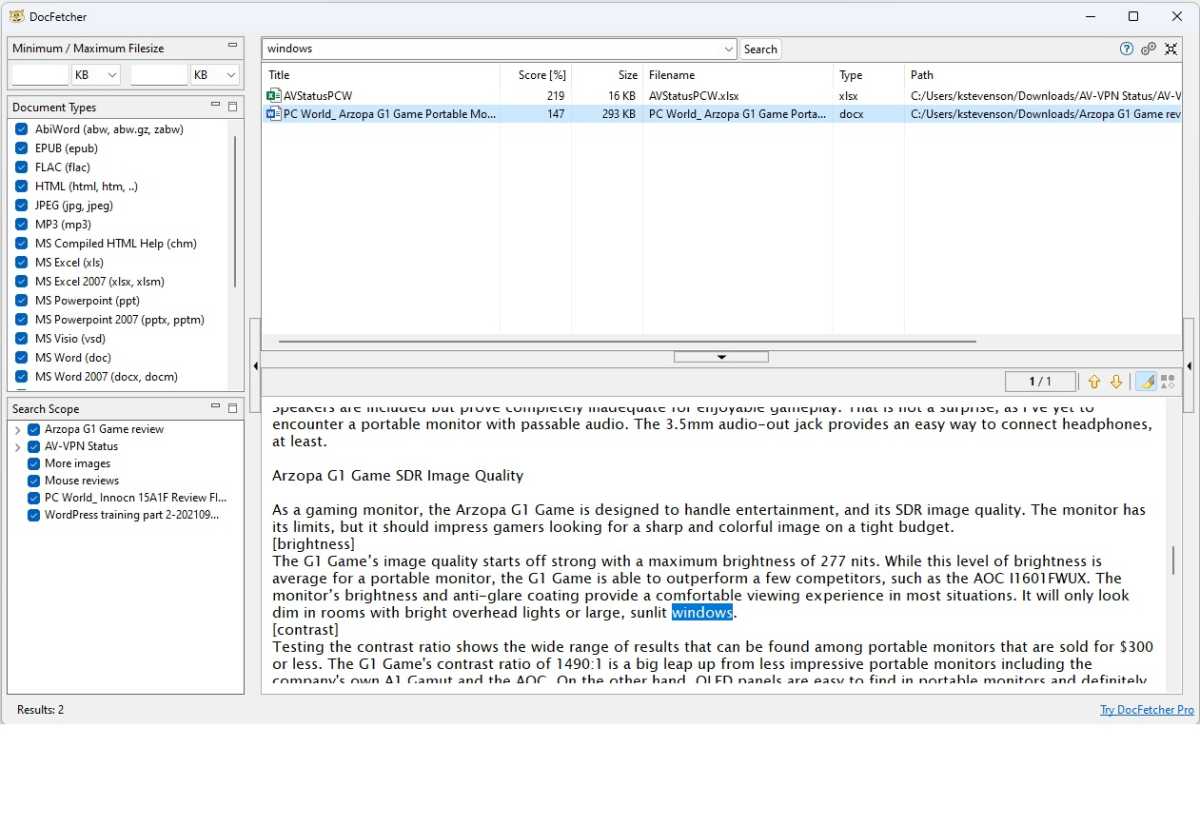
Search file contents: DocFetcher finds search terms in numerous file types. However, you must first create a search index, which takes some time.
Foundry
Where the focus is on text searches, the uncomplicated DocFetcher is the favorite. The tool requires a Java runtime environment.
First you need to create a search index. Right-click in the empty field under “Search area” and go to Create index from > Folder in the context menu. After selecting the folder to be searched, click on “OK” to start indexing. You can include several folders in the search area in this way.
The program searches Libre Office, Microsoft Office, PDF, RTF, HTML, plain text, but also MP3 and JPG, including any annotation tags. However, the analysis is limited to text information — you cannot query Exif tags for images or bit rates for audio.
When DocFetcher is running, the program automatically detects changed or new files and adds them to the index for the respective folder. However, you can also click on “Refresh” in the context menu of an entry in the search area at any time. As DocFetcher only takes into account new or changed data, this is done quickly.
6. The new and old File Explorer under Windows 11
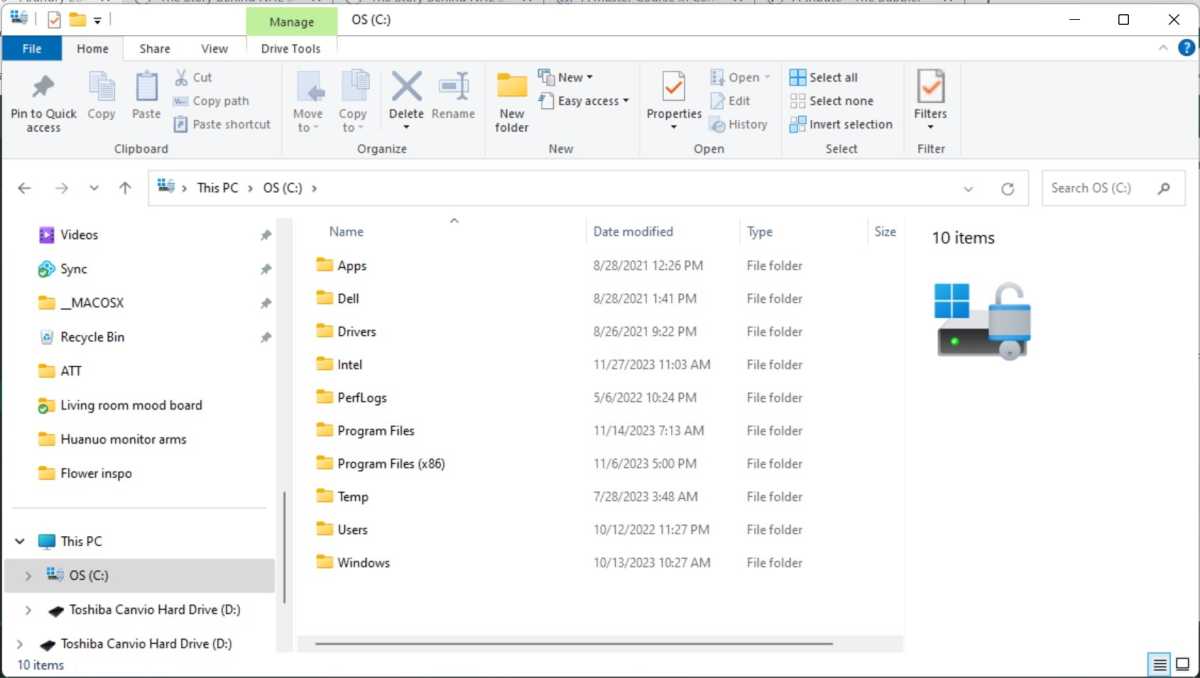
In Windows 11 you can revert to Windows 10’s ribbon interface in the Control Panel.
Foundry
Microsoft has thoroughly reorganized Windows Explorer for Windows 11. The extensive ribbon from Windows 10 has been removed in favor of a toolbar that shows icons for “Copy” and “Rename,” for example. The context menu has also been reduced and now only shows the most important entries. If you want to access the additional menu entries, such as Explorer extensions, via the context menu of files and folders, you have to hold down the Shift key when right-clicking in Windows 11.
If this is too inconvenient for you, you can restore the previous context menu. To do this, use the Winaero Tweaker tool and go to Windows 11 > Classic Full Context Menus. Tick the “Enable classic full context menus” box and click on the “Restart Explorer” button. The right mouse-click in Windows Explorer now displays the full context menu by default.
Use the previous version of Windows Explorer: The file manager from Windows 10 is still included in Windows 11 (tested with version 22H2 and 23H2). To start it, press the Win+R key combination, type in control and confirm with “OK.” This will open the Control Panel. Type C: in the input line and confirm with the Enter key. The Windows Explorer window familiar from Windows 10 appears with a ribbon and complete context menus.
For faster access, go to Windows 11 > Enable Ribbon in Winaero Tweaker and click on “Launch File Explorer with Ribbon.” Click on “Create Desktop Shortcut for Ribbon Explorer” to create a shortcut to Windows Explorer on the desktop.
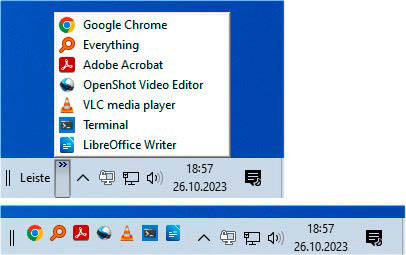
7. Use the quick launch function for the taskbar
Войдите, чтобы добавить комментарий
Другие сообщения в этой группе


Most modern laptops lack an optical drive, yet CDs and DVDs are still

You’ve had a rough week. You deserve some time to relax, chill out, m

If you want a decently powerful PC that won’t cost an arm and a leg,

A couple years ago, I finally said goodbye to my old bucket of a car

Today, I’ve found an incredible deal on one of the best higher-end ga

Blink and you may have missed it, but Google gave us a peek at what s